Also known as, damn – I’m very proud of myself!
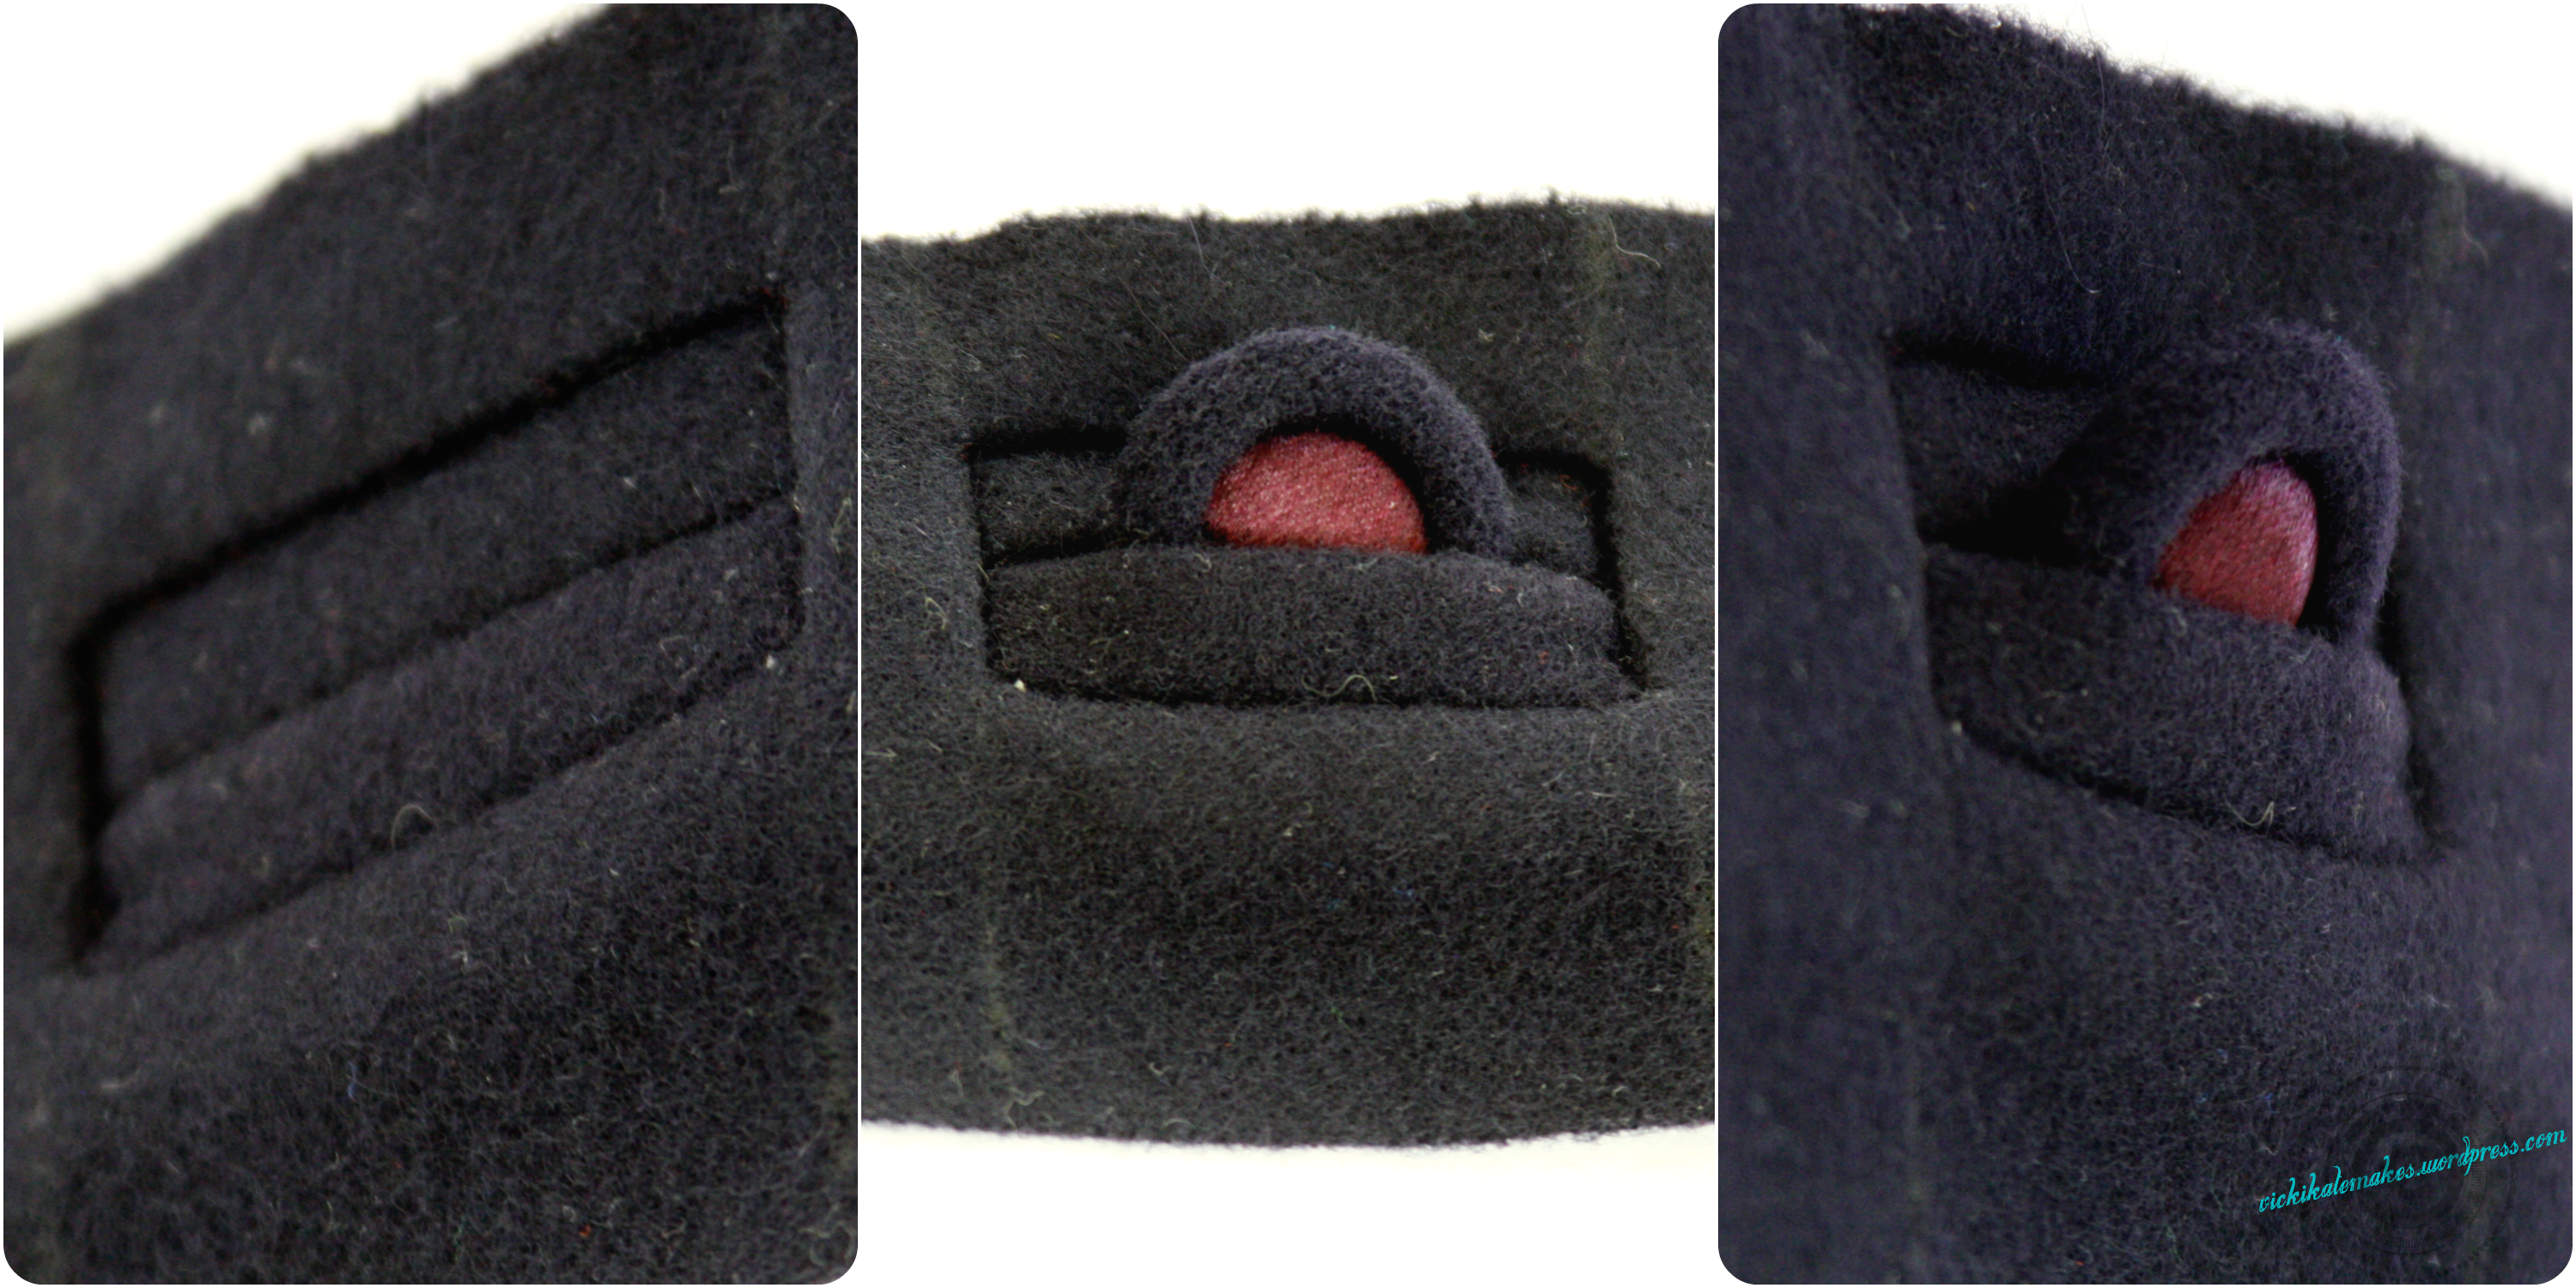
You all know I was swapping out regular old button holes for the glitz and glam slightly couture bound buttonhole. There is no way on this earth that I was going to hack holes in my gorgeous wool and cashmere blend fabric without testing this brand new to me technique out first.
I’ve had Karen’s Bound Buttonhole eBook since she launched it. I bought it as it was a technique I wanted to try out ‘some day’ and because I love reading her blog and wanted to support her self-published effort. Being completely frank, without that little eBook there is no way this would have turned out as beautifully as it has. If you haven’t done so already, buy her book. It will stand you in excellent stead when you want to use this technique.

Because the Milano Cape pattern by Papercut isn’t designed with bound button holes in mind, there aren’t any markings to help other than where to make a button hole. So I needed to determine the width of the button hole myself. Using the notes in Karen’s book I measured the width and depth of my button and added a smidge to determine how wide it should be. I included the shank in my measurements and I’m not sure that I should have done. Anyone with more experience than my one button hole have any advice on this?!
Even though this was just a practice I carefully thread basted my lines after marking them with chalk to make things easier (and whilst I photographed that step I haven’t included it in my collages – doh!). I did deviate from the prescribed welt size as I wanted something chunkier. Instead of cutting them 2cm wide (making each lip 0.5cm) I cut them 4cm wide so that each lip was 1cm. I like these proportions better.
Other than that, I did exactly as I was told and I am seriously happy with the outcome. To say this practice run has increased my confidence by a billion miles is an understatement. I now know that my buttons will fit, that the fabric presses beautifully (and smells like wet dog whilst doing so – wool, I do love you!) and that I can totally and utterly make eight of these bad boys in the real thing (eek!).
Little win, big happy!
I’ve also got to recommend the button covering service I used. I posted the cheque, order form and fabric at 22:00 on a Tuesday night and when I came home on the THURSDAY they were on my doorstep! It cost me £8.00 to have ten of these dual dome buttons made which to me is an absolute steal. In short, if you’re in the UK and want the most beautifully covered fabric buttons then I can’t recommend www.buttoncovering.co.uk enough.
Next step in Mission Milano is pre-treat what feels like miles of wool/cashmere fabric which I’m too chicken to lob in the tumble dryer with a wet towel! Anyone got any film or series recommendations that I can watch whilst I steam a mother load of fabric?!
And… Have you heard the By Hand London news? They’ve launched a kickstarter campaign to start printing fabric! I’ve made a pledge… It’d be great if you can help too. You all know that I have some serious love for those patterns (2 more rides and Flora is mine!).


I have serious buttonhole envy! That’s really fantastic. Thanks for your support.
They wouldn’t have been that good without your guidance!!
great looking buttons & buttonholes! I don’t measure the shank, only the depth of the button when calculating my bound buttonholes. As for the pre-treating of the wool, please don’t stuff it in the tumble dryer… 😦 Here’s the method I use, and you don’t need hours in front of the telly to steam the fabric.
Thoroughly wet 1 large or 2 single sheets (duvet covers also work) then spin then in the washing machine on a short cycle, slow spin.
Layer 2 layers of sheet to 1 of wool (making a sandwich), then 2 layers of sheet again
Roll into a sausage & leave for a couple of hours to absorb the damp from the sheet.
Check the fabric is moist, then air dry over a door or bannister. Place towels under the fabric. Don’t lay on anything narrow or from a clothes line – the wool will stretch.
When dry, use a dry iron to press. Press on the wrong side & check for imperfections or flaws. Don’t use steam, you want to dry the wool completely.
If you’re not using the fabric straight away, roll it up, not folding.
I’m looking forward to seeing your coat!
That sounds like a much better technique than steaming it all. The tumble dryer method terrified me! I’ll give it a go…
>
beautiful buttonholes! i really hope the BHL ladies get all the funding they need!
Me too – the potential is just staggering! They’ve come so far in what appears to be such little time. I bet there was a lot of planning before Charlotte was ever released!
O my goodness those buttonholes and buttons look so perfect! I need to buy Karen’s e-book
Thanks Fiona – all credit to Karen as I just followed her instructions!
You should be proud of yourself, those are some pretty lovely button holes. Can’t wait to see the rest of your progress.
Thank you! This is definitely a slow and steady project as I want to complete it to the best of my abilities.
The answer of an extrpe. Good to hear from you.
Beautiful stuff! If you want any more tips or resources on coat/cape making, I pulled together a little post summarizing everything I learned when I made my coat recently:
http://cashmerette.blogspot.com/2014/02/top-tips-for-sewing-your-first-coat.html
Thanks Jenny – your post is a treasure trove!
Beautiful buttonholes. I have a vintage pattern that I want to use bound buttonholes on. Hopefully I can be as successful as you.
I’m sure you can! This practice has given me so much confidence!
Wow- these look rad!
Why, thank you!
Fantastic buttonholes – they look amazing!!! I have had Karen’s book on the wishlist for some time – it seems like the go-to resource on the topic 🙂 There’s something kinda endearing about the smell of wet wool isn’t there? LOL. I’ve only ever done the tumble dry/wet towel method for pretreating wool, but that was just for wool suiting – I’ve never worked with heavy wool coating so I’m probably not the best person to ask haha ^__^
ooooooo those buttonholes are fabulous!!!